THIS MANUAL IS FOR FPP v1.x AND IS NOW OUTDATED.
Please follow the link below to go to the current version of the FPP manual.
https://falconchristmas.github.io/FPP_Manual.pdf
The manual is also available by clicking the 'Manual' link at the top of the 'Help' menu in FPP.
File Manager
The file manager is used to upload files from an external location (your computer, an external device connected to your computer etc) to the FPP.
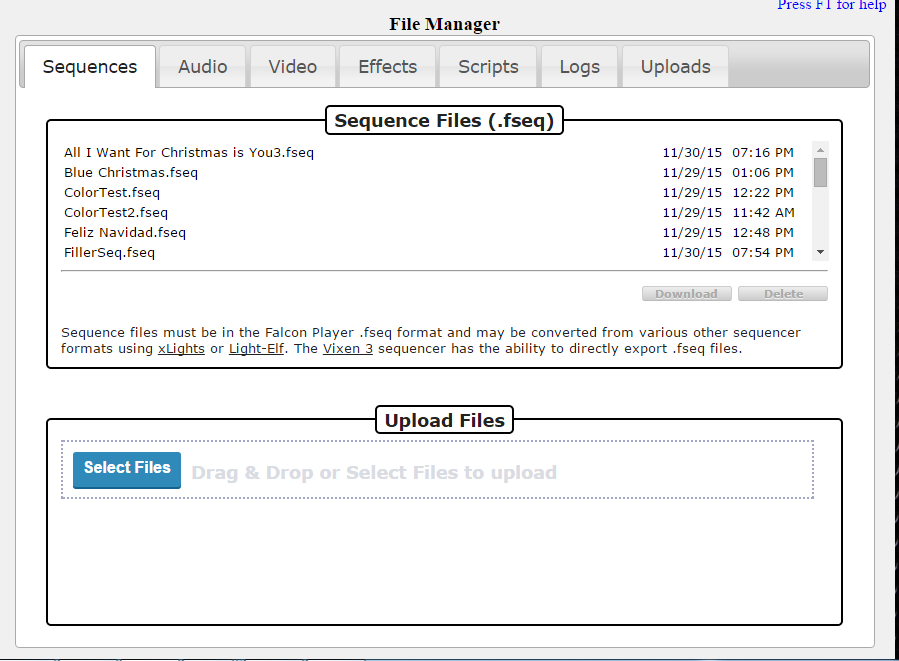
To upload sequences, Click on the Sequences tab. The sequence must have been saved as an ‘fseq’ file type.
- xLights can create this format of files natively and can also convert from some other sequencer type.
- Light-elf can be used to convert files.
- Vixen 3 can create fseq files from Vixen sequences.
The screen displays two windows of information. The top window displays all existing sequence files that have been loaded and the timestamp of when they were loaded.
The lower window ‘Upload files’ is used to upload new or updated sequences.
In order to upload a new file, click on the Select Files button, which will open by a window using which you can navigate to the required location and select a file to be uploaded. Ensure that you select an ‘.fseq’ type of file. You can also drag and drop files onto the window.
A progress bar will indicate the progress of the file(s) being uploaded.
The file is first loaded into an intermediate area and then copied over the existing sequence file (if it already exists).
When completed, the bar will change to green and that progress bar can then be closed. Multiple files can be uploaded at the same time. The uploaded file will overwrite an existing sequence file of the same name.
If the sequence has audio associated with it, then after the sequence files have been uploaded, upload the associated audio files. The two files can be uploaded in any sequence.
Tip: The next step, after uploading a sequence file (and any associated audio file), is to add the sequence/audio to a playlist.
In order to delete a sequence file (fseq) that has been uploaded, highlight the sequence in the top window and press delete.
Uploading Audio
To upload audio files, Click on the Audio tab.

Similar to the sequence window, the screen displays two windows of information. The top window displays all existing audio files that have been loaded and the timestamp of when they were loaded.
The lower window ‘Upload files’ is used to upload new or updated audio file.
In order to upload a new file, click on the Select Files button, which will open by a window using which you can navigate to the required location and select a file to be uploaded. Ensure that you select an ‘.mp3’ or ‘.ogg’ type of file. You can also drag and drop files onto the window.
A progress bar will indicate the progress of the file(s) being uploaded.
The file is first loaded into an intermediate area and then copied over the existing audio file (if it already exists).
When completed, the bar will change to green and that progress bar can then be closed. Multiple files can be uploaded at the same time. The uploaded file will overwrite an existing sequence file of the same name.
In order to delete an audio file that has been uploaded, highlight the row in the top window and press delete.
Tip: The next step, after uploading a sequence file (and any associated audio file), is to add the sequence/audio to a playlist.
Uploading Effects
An effects sequence or ‘.eseq’ is a sequence for an effect on a single model in your display.
You can run effect sequences whether a full .fseq sequence is running or not and you can have multiple many effect sequences running on different elements of your display.
Examples:
You could have an effect that scrolls 'thank you' across a matrix whenever someone trips a trigger on a donation box.
You can use effect sequences to trigger things in your show when a GPIO input is triggered by a button or pressure mat or motion detector.
To upload effect sequence files, Click on the Effects tab.

Similar to the sequence window, the screen displays two windows of information. The top window displays all existing effect sequence files that have been loaded and the timestamp of when they were loaded.
The lower window ‘Upload files’ is used to upload a new or updated ‘eseq’ file.
In order to upload a new file, click on the Select Files button, which will open by a window using which you can navigate to the required location and select a file to be uploaded. Ensure that you select an ‘.eseq’ type of file. You can also drag and drop files onto the window.
A progress bar will indicate the progress of the file(s) being uploaded.
The file is first loaded into an intermediate area and then copied over the existing eseq file (if it already exists).
When completed, the bar will change to green and that progress bar can then be closed. Multiple files can be uploaded at the same time. The uploaded file will overwrite an existing eseq file of the same name.
Effects sequences are triggered from events. The actual starting channel offset for the Effect is specified when you run it or configure the Effect in an Event. Events fire and run their scripts or start effects running in the background. The event should not be set to repeat.
If you upload an effect called ‘background.eseq’, it will automatically start when the FP starts up.
Note: You do not need to upload the ‘background.eseq’ to both the master and remote if you only want to run it on the remote.
If you go to the effects screen, you should see an effect (including the background effect) running and can stop it.
In order to delete an eseq file that has been uploaded, highlight the row in the top window and press delete.
Tip: The next step, after uploading an eseq file (and any associated audio file), is to add the effect sequence to an event and then add the event to a playlist.
Tip: There is a script ‘fseqtoeseq’ available to convert an fseq file to an eseq file where the sequence has been created using a sequencer that does not support creating an eseq file natively (LOR, LSP etc).
Uploading Scripts
Similar to the other File Manager windows, the screen displays two windows of information. The top window displays all existing script files that have been loaded and the timestamp of when they were loaded.
The lower window ‘Upload files’ is used to upload a new or updated script file.
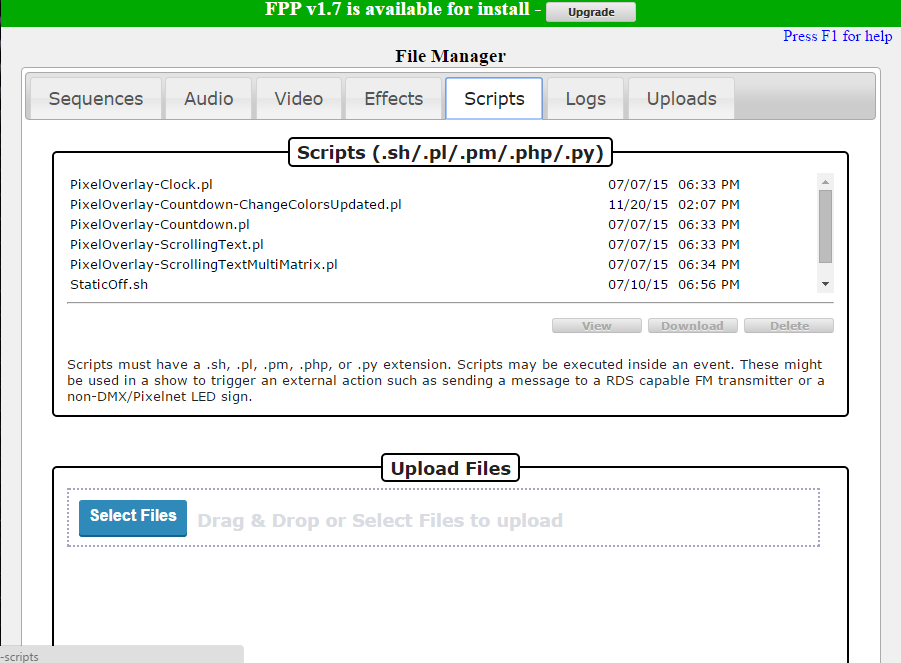
In order to upload a new file, click on the Select Files button, which will open by a window using which you can navigate to the required location and select a file to be uploaded. Ensure that you select an ‘.sh’ or ‘pl’ type of file. You can also drag and drop files onto the window.
A progress bar will indicate the progress of the file(s) being uploaded.
The file is first loaded into an intermediate area and then copied over the existing file (if it already exists).
When completed, the bar will change to green and that progress bar can then be closed. Multiple files can be uploaded at the same time.
Scripts are triggered from events. Events fire and run their scripts or start effects running in the background. The event should not be set to repeat.
In order to delete a script file that has been uploaded, highlight the row in the top window and press delete.
Tip: The next step, after uploading a script file (and any associated audio file), is to add the effect sequence to an event and then add the event to a playlist.
Accessing Logs
The application logs can be accessed by clicking on the Logs tab.
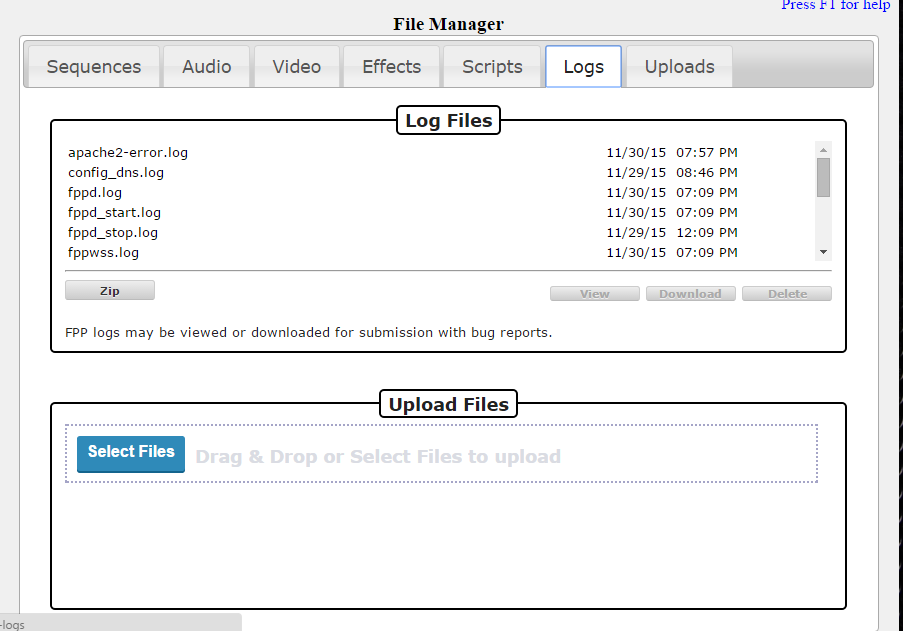
In order to view a particular log, highlight the entry and then click on View. The log file will open and display the details.
By clicking on the ‘Zip’ button, all the log files will be zipped into a zip file. Then click on the download button to download the zipped file.
In order to delete one or more log files, highlight the entry and click on Delete. A new version of the log file will be recreated when the FPP next boots.
Setting the level of logging
The level of logging can be changed via the FPP Settings screen.
Uploaded Files Area
The ‘Uploaded Files Area’ is used when a file is being uploaded.
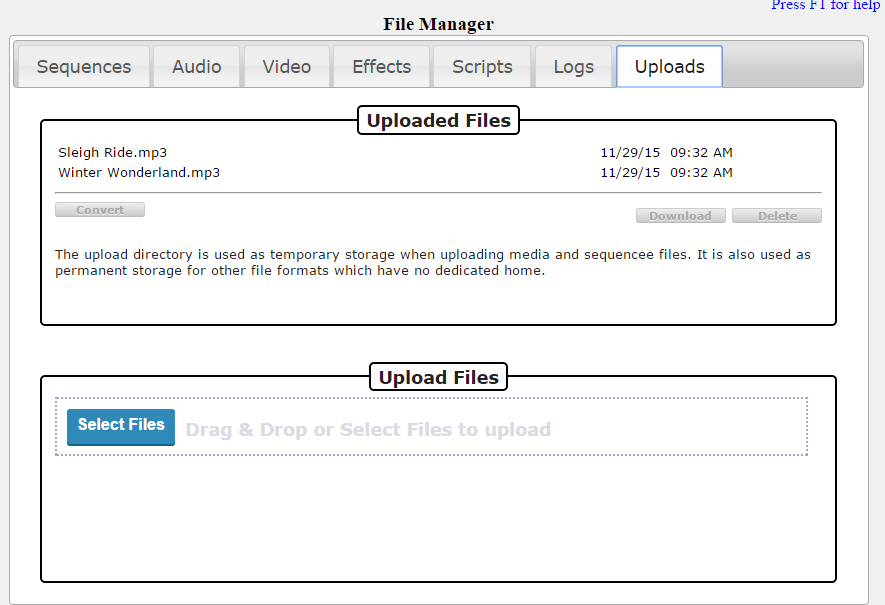
It is also used as a repository for files that have been uploaded that do not belong to any of the other ‘tabs’. For example, if you upload a sequence.xml file (rather than the fseq file), it will be retained in this area.
If a file is deleted, via one of the other tabs, it will be moved to this area.
To delete a file from here, highlight the entry and then click on Delete.
You can also download a file, by highlighting on the entry and Clicking ‘Download’.