THIS MANUAL IS FOR FPP v1.x AND IS NOW OUTDATED.
Please follow the link below to go to the current version of the FPP manual.
https://falconchristmas.github.io/FPP_Manual.pdf
The manual is also available by clicking the 'Manual' link at the top of the 'Help' menu in FPP.
What hardware do I need
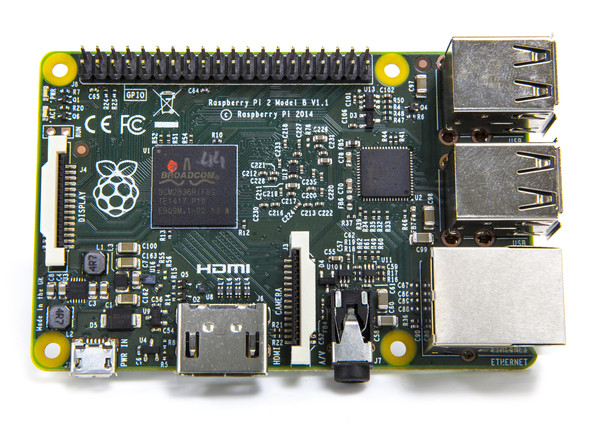
As of the end of the 2015 Christmas season, almost every user using the FPP started off with and used the Raspberry PI as the main player.
The FPP on the PI can interface to a number of controllers via a router. It can also play synchronized audio via an audio port /FM transmitter, synchronized video (via an HDMI or VGA port), support 4 USB drives and support applications via the GPIO bus. It can also drive pixels directly via the GPIO bus.
Most users, therefore use it as the main and only player, connect it to one or more (E131/DMX) controllers and run their light show sequences and audio off it.
A second instance of the Raspberry PI is often used to connect to a remote projector and play video – which is aligned to the sequences/audio running on the main (master) Raspberry PI/FPP.
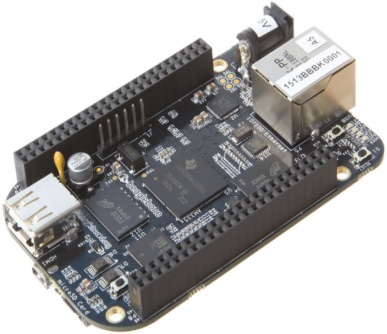
The Beagle Bone Black (BBB) has been extensively used in 2015 to drive P10 panels (connected together to act as a matrix). The BBB requires an Octoscroller cape. Audio is also supported (version 1.7 onwards).
The BBB can also support other capes such as the F16B, F4B etc. Only one cape can be used at a time.
The BBB/FPP runs as a remote instance to the master Raspberry PI. It can run as the master itself, but few people do so.
The Beagle Bone Green (BBG) was relatively new in 2015 and costs less than the BBB. It is similar to the BBB, except that it does not have an HDMI port for video. The BBG also uses an Octoscroller cape and supports the other capes.
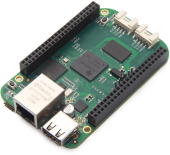
Early in 2016 , the Raspberry Pi v 3B and the raspberry Pi zero were announced. FPP version 1.8 onwards supports these boards.
Raspberry Pi

Required Items:
- Raspberry Pi Model 2 B , 2B+ or 3B
- Micro SD memory card for FPP OS image (can also be used for sequences , audio and video files). 8GB , Class10 or better is most commonly used
- Power Supply for the Pi. 5vdc 2A microUSB or 5vdc 3A microsUSB for Pi 3B
Optional Items:
- USB flash drive for sequences, audio and video media files, event scripts, logs, etc.
- Wireless USB dongle
- RasClock Real Time Clock Module
- USB Hub
- USB serial dongles
- FPD - Falcon Pixelnet/DMX (/Renard) adapter
BeagleBone Black or BeagleBone Green
The BBG is a recent (less expensive) addition to the Beagle Bone family. It is very similar to the BBB especially with respect to software. Both platforms share the same processor, but there are a few differences with regard to hardware peripherals.
The BeagleBone Green is better suited to embedded applications than the BeagleBone Black, but you can still use the BeagleBone Green as a standalone Linux computer, although without the HDMI support for monitors that is on BeagleBone Black.
The BeagleBone Green supports all of the hardware add-on modules (called "capes") as BeagleBone Black, including capes that can support a monitor.
Required Items:
- Beagle Bone Black (Rev C) or Beagle Bone Green
- Micro SD memory card for FPP OS image (can also be used for sequences , audio and video files)
- 8GB , Class10 or better is most commonly used
- Power Supply for the Pi. 5vdc 2A
- Octoscroller Cape if connecting the BBB/BBG to (P10) Panels (most common use)
Optional Items:
- USB flash drive for sequences, audio and video media files, event scripts, logs, etc.
- Wireless USB dongle
- RasClock Real Time Clock Module
- USB Hub
What order do I do things in?
- Ensure that you have the right media and format it as required.
- For the Raspberry Pi, you need a micro SD card (preferably 8GB) and a USB drive (preferably 16GB).
- For the BBB or BBG, there are two options:
- You can load and run the FPP on the inbuilt eMMC memory and use the micro SD card for sequences/data. In which case, you only need a micro SD card (preferably 8 GB).
- You can load and run the FPP on the micro SD card use a USB for sequences/data. In which case, you need a micro SD card (preferably 8 GB) and a USB drive (preferably 16GB.
The formatting process is described in the Chapter Three: Installation section.
- Download and install the FPP software image. Depending on the options and hardware you are doing the installation for, select one of the three images to download. The simplest approach is to have your PI/BBB/BBG connected via Ethernet cable to a spare port of your home router, even if this is not your final configuration.
The installation process is described in the Chapter Three: Installation section.
- After the installation process is complete, reboot the PI/BB. If connected to the internet (highly recommended), the FPP will look for, and install any (current release) updates that have been published since the image was released.
- Configure the Network Definition section. This is described in Chapter Five: Input/Output Setup. You may not need to change the defaults at this stage if connected to your home network, but review what has been defined.
- Configure the Channels Output section (E1.31 section). This maps the channels from your sequence models to the Universes and channels outputs that your controllers expect. This is described in Chapter Five: Input/Output Setup.
If you are setting up the BBB/BBG for P10 panels, then you should define the setup in the LED Panels section described in Chapter Five: Input/Output Setup
- Upload your sequence (fseq) file and media (mp3/mp4) to the FPP using the File Manager. See Chapter Six: Content Setup.
- Use the Display Testing screen to test channels and /or the sequence output. This is described in Chapter Seven: Status / Control
- Setup one or more Playlists and run the Playlist from the Status screen to test the sequence with audio. See Chapter Six: Content Setup . You need to have an audio device connected to your main FPP – this can be a set of simple desk speakers connected to the audio jack.
- If you have more than one FPP
- Repeat for any additional FPP instances (using Standalone mode)
- Change to Master and Remote modes.
- Select / refresh the Multi sync configuration.